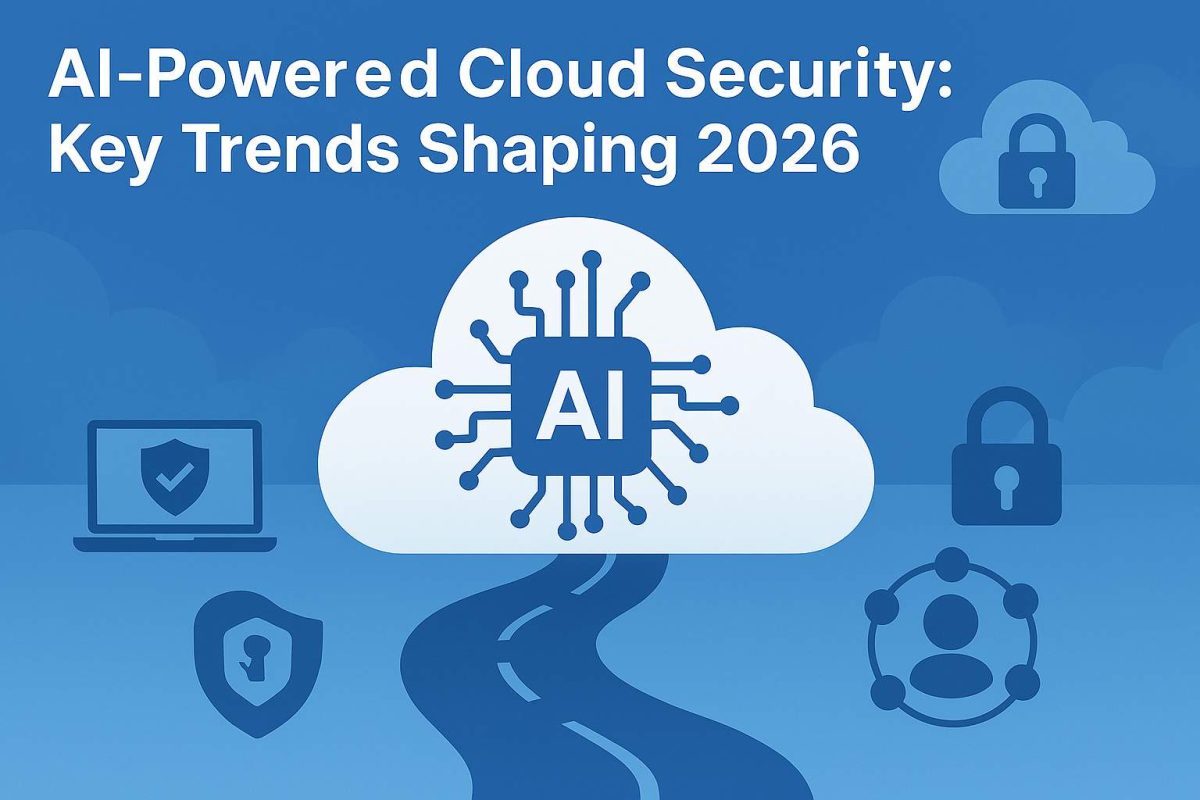
Building Resilience under NIS2: First Steps to Secure Your Organization

In an era where cyber threats are evolving faster than ever, the European Union’s NIS2 Directive represents a pivotal shift in how organizations must approach cybersecurity. Adopted in 2022 and transposed into national laws by October 2024, NIS2 builds on the original NIS Directive to create a more robust framework for protecting critical infrastructure and essential services across the EU. This blog post dives deep into what NIS2 means for your organization, why building resilience is crucial, and the practical first steps to achieve compliance. We’ll also explore optimization strategies to not only meet requirements but to enhance your overall security posture efficiently.

Whether you’re an essential entity (like energy providers or healthcare organizations) or an important one (such as manufacturing or digital service providers), NIS2 demands proactive measures to mitigate risks and respond to incidents. By prioritizing resilience, you can turn compliance into a competitive advantage, safeguarding operations, data, and reputation in a hyper-connected world.

What is the NIS2 Directive?

The NIS2 Directive (Directive (EU) 2022/2555) is the EU’s updated legislation aimed at achieving a high common level of cybersecurity across member states. It expands the scope from the 2016 NIS1 Directive, which focused primarily on operators of essential services (OES) and digital service providers (DSPs). NIS2 now covers 18 critical sectors, including energy, transport, banking, health, water, digital infrastructure, public administration, space, and new additions like waste management, postal services, and critical product manufacturing.

Key differences include:

    • Broader Scope: Applies to medium and large enterprises in essential and important entities, with some small entities included if they pose systemic risks.
    • Stricter Requirements: Mandates “all-hazards” risk management, supply chain security, and incident reporting within tight timelines (e.g., initial notification within 24 hours).
    • Management Accountability: Top executives can face personal liability for non-compliance, emphasizing cybersecurity as a board-level priority.
    • Enhanced Cooperation: Establishes networks like CSIRTs (Computer Security Incident Response Teams), EU-CyCLONe for crisis management, and the NIS Cooperation Group for information sharing.

Non-compliance can result in hefty fines—up to €10 million or 2% of global annual turnover for essential entities—making it imperative to act now.

Why Focus on Building Resilience Under NIS2?

Resilience under NIS2 isn’t just about ticking boxes; it’s about creating a cybersecurity ecosystem that can withstand, adapt to, and recover from threats. Cyber incidents in critical sectors can have cascading effects, disrupting supply chains, economies, and public safety. For instance, ransomware attacks on healthcare or energy providers have real-world consequences, as seen in recent high-profile breaches.

NIS2 promotes resilience by requiring organizations to adopt risk-based approaches, including technical, operational, and organizational measures. This not only minimizes vulnerabilities but also fosters a culture of continuous improvement. Benefits include reduced downtime, better stakeholder trust, and alignment with other frameworks like GDPR or ISO 27001, streamlining compliance efforts.

First Steps to Secure Your Organization

Getting started with NIS2 compliance requires a structured approach. Here’s a step-by-step guide based on expert recommendations and official guidance.

Step 1: Determine If You’re in Scope

The foundation of compliance is understanding applicability. Review your operations against the 18 sectors listed in NIS2 Annexes I and II. Essential entities (e.g., energy, transport) face stricter oversight, while important entities (e.g., manufacturing) have slightly lighter supervision but similar obligations.

    • Action Items: Conduct an internal audit to classify your entity. Consult national authorities or legal experts if uncertain. Tools like self-assessment checklists from sources such as the NIS Cooperation Group can help.
    • Optimization Tip: Integrate this into your annual risk review to avoid siloed efforts. Use automated asset discovery tools to map your digital footprint efficiently.

Step 2: Conduct a Comprehensive Risk Assessment

Risk assessment is the cornerstone of NIS2. Identify threats, vulnerabilities, and potential impacts on your network and information systems.

    • Action Items: Map assets, evaluate threats (e.g., via threat modeling), and prioritize risks using frameworks like NIST or ENISA guidelines. Include supply chain risks, as NIS2 emphasizes third-party security.
    • Optimization Tip: Leverage cybersecurity platforms that automate risk scoring and provide real-time insights, reducing manual effort and improving accuracy. Aim for a “all-hazards” approach, covering not just cyber but also physical and operational risks.

Step 3: Implement Risk Management Measures

NIS2 requires “appropriate and proportionate” measures to manage risks, including policies on cryptography, access control, and multi-factor authentication.

    • Action Items: Develop or update policies for vulnerability handling, business continuity, and crisis management. Secure supply chains by vetting vendors and including cybersecurity clauses in contracts.
    • Optimization Tip: Adopt zero-trust architectures and SASE (Secure Access Service Edge) solutions for scalable security. Prioritize high-impact measures first, using cost-benefit analysis to optimize resource allocation.

Step 4: Establish Incident Response and Reporting Protocols

Timely reporting is a NIS2 hallmark: initial reports within 24 hours, updates within 72 hours, and final reports within a month.

    • Action Items: Create an incident response plan (IRP) with clear roles, escalation procedures, and testing via simulations. Set up channels for notifying national CSIRTs or competent authorities.
    • Optimization Tip: Integrate AI-driven monitoring tools for faster detection and automated reporting templates to streamline compliance. Regular tabletop exercises can enhance team readiness without significant costs.

Step 5: Foster Cybersecurity Governance and Awareness

Management must oversee cybersecurity, with training programs for all staff.

    • Action Items: Appoint a CISO or equivalent, conduct regular training, and ensure board involvement in cybersecurity decisions.
    • Optimization Tip: Use gamified training platforms to boost engagement and retention. Align governance with business objectives to make cybersecurity a strategic enabler, not just a cost center.

Step 6: Document and Audit Everything

Compliance demands evidence. Maintain records of assessments, measures, and incidents.

    • Action Items: Develop a compliance roadmap with timelines and responsibilities. Schedule internal audits and prepare for external ones.
    • Optimization Tip: Employ compliance management software to automate documentation and tracking, ensuring audit-readiness with minimal overhead.

Optimizing Your NIS2 Compliance Journey

To go beyond basics, focus on efficiency and integration:

    • Leverage Technology: Tools like SAFE for risk management or integrated platforms for monitoring can automate much of the heavy lifting.
    • Collaborate Externally: Join the NIS Cooperation Group networks or industry forums for shared insights.
    • Measure ROI: Track metrics like mean time to detect/respond (MTTD/MTTR) to quantify resilience improvements.
    • Stay Updated: Monitor national transpositions and EU updates, as NIS2 allows for some flexibility in implementation.

By optimizing, you can reduce compliance costs by up to 30% through automation and integrated approaches, while enhancing overall security.

Conclusion:

Building resilience under NIS2 is an ongoing process that starts with these foundational steps. By assessing your scope, managing risks, and embedding cybersecurity into your culture, your organization can not only comply but thrive in a threat-laden landscape. Remember, NIS2 is about collective EU security—your efforts contribute to a safer digital single market.

If you’re just starting, prioritize a gap analysis today. For tailored advice, consult cybersecurity experts or national authorities. Stay resilient, stay secure.

Security Advantages of Google Workspace over SmarterMail

Google Workspace offers enterprise-grade, cloud-native security features that significantly outpace SmarterMail’s on-premises capabilities, particularly for businesses handling sensitive data in regulated industries like finance, healthcare, or government. SmarterMail provides solid built-in protections such as anti-spam filtering (using greylisting, SPF, DKIM, and DMARC), antivirus integration (e.g., ClamAV or Microsoft Defender), and intrusion detection systems (IDS) for DoS protection. However, these are largely server-side and require manual configuration, third-party add-ons (like Cyren for advanced spam or Message Sniffer for malware), and ongoing IT maintenance to keep up with evolving threats. In contrast, Google Workspace leverages Google’s global infrastructure, AI-driven defenses, and automated compliance tools, reducing the burden on internal IT teams and providing proactive, scalable security without hardware investments.

Key security advantages include:

  • Advanced AI-Powered Threat Detection and Prevention: Google Workspace uses machine learning in Gmail to block over 99.9% of spam, phishing, and malware automatically, including zero-day threats via real-time analysis. This is far more robust than SmarterMail’s rule-based filtering, which can miss sophisticated attacks without add-ons. For example, Google’s defenses scan attachments in a sandbox and block phishing links before they reach inboxes, while SmarterMail relies on integrated or external tools that may not update as dynamically.
  • Zero-Trust Architecture and Multi-Factor Authentication (MFA): Workspace enforces zero-trust by verifying every user and device access, with built-in MFA (including hardware keys like FIDO2) and context-aware controls (e.g., blocking access from suspicious IPs or unmanaged devices). SmarterMail supports basic authentication but lacks native zero-trust; admins must configure it manually, increasing vulnerability to breaches if overlooked.
  • Data Encryption and Sovereignty: Data is encrypted in transit (TLS) and at rest (AES-256), with options for customer-managed keys and data residency controls (e.g., storing data in specific regions like the EU for GDPR compliance). SmarterMail offers encryption but ties it to on-premises servers, exposing it to physical breaches or misconfigurations. Google’s global data centers also provide automatic failover and redundancy, minimizing downtime risks that on-premises setups like SmarterMail face during hardware failures.
  • Compliance and Auditing Tools: Workspace is certified for ISO 27001, SOC 2/3, HIPAA, GDPR, and more, with built-in tools like Vault for eDiscovery, data retention policies, and audit logs. This simplifies regulatory audits without custom scripting. SmarterMail supports compliance (e.g., SOX, HIPAA via archiving), but it requires manual setup and third-party integrations, making it less efficient for large-scale corporate audits.
  • Endpoint and Device Management: Integrated with Android, iOS, ChromeOS, and Windows, Workspace offers endpoint management for enforcing policies like device encryption and remote wipes. SmarterMail’s mobile sync (via ActiveSync) is functional but lacks this breadth, often needing extra tools for cross-platform security.

In corporate environments, these features reduce breach risks—Google reports zero account takeovers for adopters like Snap after implementing Workspace’s FIDO2 keys. On-premises solutions like SmarterMail have faced vulnerabilities (e.g., CVE-2019-7214 deserialization issues in older versions), highlighting the maintenance challenges.

Other Important Features for the Corporate World and Businesses

Beyond security, Google Workspace excels in scalability, collaboration, and cost-efficiency for businesses, addressing pain points of on-premises systems like SmarterMail. SmarterMail is a cost-effective Exchange alternative with features like shared calendars, tasks, group chat, and webmail, but it’s limited to email/groupware without the integrated ecosystem of Workspace. It requires server hardware, OS management (Windows/Linux), and IT expertise for updates, backups, and scaling—ideal for small setups but burdensome for growing enterprises. Workspace, as a fully cloud-based SaaS, eliminates these overheads, enabling remote/hybrid teams to collaborate seamlessly without infrastructure costs.

Collaboration and Productivity Tools

  • Real-Time Collaboration Suite: Workspace integrates Gmail, Drive (30GB+ storage per user, unlimited in Enterprise), Docs, Sheets, Slides, Meet (up to 500 participants in Enterprise), and Chat for instant, version-controlled teamwork. Multiple users edit documents simultaneously with comments and suggestions—far superior to SmarterMail’s basic shared calendars/tasks, which lack AI enhancements like Smart Compose in Gmail or Gemini AI for summarizing meetings/docs. Businesses report reduced email silos and faster decision-making, as seen in HCLSoftware’s adoption for end-to-end control.
  • AI and Automation: Gemini AI assists with email drafting, data analysis in Sheets, and video editing in Meet, boosting productivity by 20-30% for teams. SmarterMail has no native AI, relying on manual processes or add-ons.
  • Scalability and Accessibility: Add users instantly without hardware upgrades; supports unlimited users in Enterprise plans. Access from any device/browser with offline sync—crucial for global teams. SmarterMail scales via licenses but ties to server capacity, risking downtime during peaks.

Cost and Management Efficiency

  • Lower Total Cost of Ownership (TCO): Starts at $6/user/month (Business Starter), including unlimited storage options and no hardware/maintenance costs. SmarterMail’s upfront licensing ($499 for 250 users) plus server expenses (hardware, power, IT staff) often exceeds this long-term, especially for scaling businesses. Workspace’s automatic updates and 99.9% uptime SLA reduce IT overhead by up to 50%, per user testimonials.
  • Admin Console and Integration: Centralized dashboard for user management, app controls, and SSO (e.g., with Active Directory). Marketplace integrates 100+ apps (e.g., CRM, Slack). SmarterMail’s API is robust but lacks Workspace’s ecosystem breadth.
  • Reliability and Uptime: Google’s infrastructure ensures 99.9%+ uptime with global redundancy; no single-point failures like on-premises SmarterMail servers.

Compliance and Business Continuity

  • Built-in Tools for Regulations: Vault for legal holds and eDiscovery; DLP to prevent sensitive data leaks (e.g., blocking SSNs in emails). Meets PCI-DSS, CCPA, and more out-of-the-box. SmarterMail requires custom setups for similar compliance.

In summary, for corporate use, Google Workspace’s cloud advantages—superior security automation, integrated collaboration, and reduced IT costs—make it ideal for scaling businesses, remote teams, and compliance-heavy sectors. SmarterMail suits cost-conscious, control-focused SMBs with in-house IT but falls short in modern, agile environments. If your business prioritizes ease and innovation over on-premises customization, Workspace delivers measurable ROI through productivity gains and risk reduction.

Remote Desktop File Sharing Made Easy: A Beginner-to-Pro Walkthrough

Whether you’re a seasoned IT professional or just starting, securely and efficiently transferring files between your local computer and a remote desktop is a common necessity. This guide will walk you through various methods, from simple copy-and-paste to more advanced techniques, ensuring you can handle any file-sharing scenario.

1. The Classic: Copy and Paste via RDP

The most straightforward method for transferring small files is using the familiar copy-and-paste function. This is made possible by enabling clipboard sharing within your Remote Desktop Protocol (RDP) client.

How to:

    1. Open the Remote Desktop Connection client on your local computer.
    2. Click on Show Options to expand the settings.
    3. Navigate to the Local Resources tab.
    4. Under the “Local devices and resources” section, ensure the Clipboard checkbox is ticked.
    5. Connect to your remote desktop as usual.

Once connected, you can copy files (Ctrl+C) from your local machine and paste them (Ctrl+V) onto the remote desktop, and vice-versa.

2. For the Power User: GUI-Based SFTP Client

When dealing with larger files or needing a more robust file transfer solution, a GUI-based SFTP (Secure File Transfer Protocol) client is an excellent choice. Popular clients like FileZilla and WinSCP provide a user-friendly interface for managing files between your local and remote machines.

How to (General Steps):

    1. Download and install an SFTP client on your local computer.
    2. Open the client and create a new session.
    3. Enter the remote server’s IP address, username, and password. Select SFTP as the protocol.
    4. Once connected, you’ll see a dual-pane view showing your local files on one side and the remote files on the other.
    5. Simply drag and drop files between the two panes to transfer them.
GUI-based SFTP client like FileZilla or WinSCP

3. Seamless Integration: Server Message Block (SMB)

SMB is a network file-sharing protocol that allows you to access and manage files on a remote server as if they were on your local machine. It’s the technology behind Windows’ “shared folders.”

How to (General Steps):

    1. On the remote computer, create a folder and enable sharing.
    2. Set the necessary permissions for the users who will be accessing the folder.
    3. On your local computer, you can map the shared folder as a network drive for easy access.
Illustration of SMB file sharing

4. The Familiar Interface: Using File Explorer

You can directly access shared folders on a remote computer through Windows File Explorer. This method is intuitive and doesn’t require any additional software.

How to:

    1. Open File Explorer on your local computer.
    2. In the address bar, type \\remote-computer-name\shared-folder-name and press Enter.
    3. You will be prompted for your credentials for the remote computer.
    4. Once authenticated, you can access and manage the files in the shared folder.
Windows File Explorer accessing a remote shared folder

5. The Command-Line Approach: FTP/SFTP

For those who are comfortable with the command line, FTP (File Transfer Protocol) and its secure version, SFTP, offer a powerful way to transfer files.

How to (General Steps):

    1. Open a command prompt or terminal on your local computer.
    2. Use the ftp or sftp command to connect to the remote server.
    3. Use commands like put to upload files and get to download files.
command prompt with FTP/SFTP commands

6. Direct Access: Drive Sharing via RDC

Remote Desktop Connection (RDC) allows you to share your local drives with the remote desktop, making file transfers seamless.

How to:

    1. Open the Remote Desktop Connection client.
    2. Click on Show Options.
    3. Go to the Local Resources tab.
    4. Under “Local devices and resources,” click on More….
    5. Check the boxes next to the drives you want to share.
    6. Connect to the remote desktop. Your shared drives will appear in the remote computer’s File Explorer.

Remote Desktop Connection settings with local drives shared

More Options to Explore

Beyond the methods mentioned above, several other tools and services can facilitate remote file sharing:

  • Cloud Storage Services: Services like Google Drive, Dropbox, Systron SFS , Acronis Cloud  and OneDrive allow you to sync files between your local and remote computers.
  • Third-Party Remote Desktop Software: Tools like AnyDesk, TeamViewer, and Splashtop offer built-in file transfer features.
  • Nearby Sharing (Windows): For devices on the same network, Windows’ Nearby Sharing feature allows for quick and easy file transfers.
  • If you are looking for ordering reliable Windows Dedicated Servers or VPS  for using RDP, give us a try.

By understanding these various methods, you can choose the best approach for your specific needs, ensuring that your remote file transfers are always a breeze. Happy sharing!

The European Accessibility Act (EAA): Are Your Emails Compliant?

The European Accessibility Act (EAA) is a new EU directive designed to make products and services, including digital communications, accessible to people with disabilities. Approved in 2019, the EAA will enter into force on June 28, 2025. After that date, businesses operating in the EU (or serving EU customers) must ensure that their digital content – websites, apps and emails – meet strict accessibility standards. In practice, this means that every marketing newsletter or transactional message you send to European users needs to be perceivable, operable, understandable and robust, in line with established guidelines.

Complying with the EAA is not just about avoiding fines – it’s about reaching a wider audience. An estimated 135 million people in the EU have disabilities. Accessible emails ensure your message gets to everyone (and isn’t filtered out by assistive technology). Conversely, ignoring email accessibility now puts your business at risk of legal penalties and market exclusion when the 2025 deadline arrives. This blog will explain the EAA’s requirements for emails, the risks of non-compliance, and how to make both marketing and transactional emails fully accessible. We’ll cover practical coding tips (headings, alt text, contrast, etc.), show examples of compliant vs. non-compliant email design, and point you to key standards like WCAG 2.1 AA and EN 301 549. Finally, we’ll give you an email accessibility checklist of best practices to help you get ready well before 2025.

Under the EAA, June 28, 2025 is the hard deadline. By that date, all new products and services must comply with EU accessibility rules. In practice, that means if your company is sending emails in 2026, those emails will have to meet EAA standards. (Older contracts have a transition grace period until 2030, but don’t count on that for your email campaigns.) Enforcement will be handled by national authorities in each member state, through market surveillance and penalties.

The consequences for failing to comply can be severe. While member states set their own fines, reports suggest penalties range from thousands to hundreds of thousands of euros per violation. For example, some EU regulators impose daily fines for ongoing issues (around €1,000/day in some cases), and repeated or serious breaches can trigger much larger fees. ReciteMe notes that some countries allow fines up to €250,000 for major accessibility failures. In addition to direct penalties, non-compliant businesses risk lawsuits (including consumer complaints) and damage to their reputation. Regulatory scrutiny could even bar you from certain EU markets, especially if you bid for public-sector contracts that increasingly require accessibility.

Bottom line: as of mid-2025, “business as usual” emails in the EU must be accessible. Ignoring this won’t just be a technical oversight – it could trigger fines, lost customers, and legal action. The good news is that you have time to prepare. Start by understanding the guidelines for accessible emails below, and begin auditing and updating your templates now.

Who Must Comply?

The EAA applies to companies that supply digital services to EU markets, which includes email marketing and customer communications. The rules do not apply to micro-enterprises (fewer than 10 employees and under €2 million turnover), but beyond that threshold, nearly all businesses with an EU presence are covered. In practice, if you send email newsletters or transactional emails (order confirmations, password resets, etc.) to EU recipients, you need to meet the EAA’s accessibility requirements. For instance, Mailgun confirms that both marketing emails and essential service emails (like receipts or shipping notices) “fall under the umbrella of digital services” and must comply.

Core Accessibility Standards: WCAG and EN 301 549

The EAA is a law, not a design guide, so it doesn’t spell out exact technical methods. Instead, it incorporates established standards. The key benchmark is WCAG 2.1 AA (Web Content Accessibility Guidelines, level AA), which defines success criteria for digital content. The EAA refers to EN 301 549 – the EU’s harmonized ICT accessibility standard – and EN 301 549 already incorporates WCAG 2.1 AA for web/digital content. In effect, following WCAG 2.1 AA is the way to achieve “EAA compliance” for emails. As one accessibility expert puts it, “to be EAA-compliant, businesses must adhere to WCAG 2.1 Level AA”.

So how do you make an email WCAG 2.1 AA–accessible? At a high level, WCAG covers things like text alternatives, contrast, keyboard operability, semantic structure, and more (the four POUR principles). Much of WCAG for websites can be applied to HTML email: e.g. provide alt text for images, ensure sufficient contrast (ratio 4.5:1 or higher for normal text), use proper headings and labels, make sure interactive elements are keyboard-accessible, and so on. (Note: some interactive features like complex scripts or ARIA roles may be limited by email client support, but you should follow best practices wherever possible.) In this blog we’ll go through the main points.

Technical Best Practices for Accessible Emails

Below are key guidelines and implementation tips for making emails accessible. These apply to both marketing campaigns and transactional emails (order confirmations, notifications, etc.). Whenever possible, use HTML format (rather than plain text or RTF) so you can include semantic markup.

  • Use semantic structure (headings, paragraphs, lists). Organize your email like a well-written article: a clear main heading, logical subheadings, and content in logical order. For example, use an <h1> tag for the email’s main title, and use <h2>, <h3>, etc. for subsections. Screen reader users often navigate by jumping between headings, so this structure matters. Never rely on images for text headlines; use real text and heading tags. Also wrap text in <p> (paragraph) tags rather than using manual <br> line breaks, so that assistive technologies know where paragraphs begin and end. Bullet-point lists should use <ul>/<li> or <ol> tags for proper list structure.
  • Provide meaningful alternative text for images. Every informative image must include a concise but descriptive alt attribute. The alt text should convey the image’s purpose or content (“red leather handbag with gold hardware” rather than “image of product”). Decorative images (purely visual flourishes) should use alt="" so screen readers skip them. Never use an image of text to convey important information; if you do, include that text in the surrounding HTML as well. (In other words, don’t put sale prices or instructions only in an image – always have the same info as selectable text.) Including alt text is critical: without it, a screen reader will either skip the image or announce an unhelpful filename, and the user misses the content.
  • Ensure high color contrast and readability. Text must be easy to read against its background. WCAG 2.1 requires a contrast ratio of at least 4.5:1 for normal text (3:1 for large text). Concretely, black text on white is ideal; avoid light gray text on white or any low-contrast combination. You can test colors with tools like the WebAIM Contrast Checker. Use sufficiently large font sizes (generally >= 14px) and readable font families (sans-serif fonts like Arial or Verdana). Left-align body text for better readability, and use ample line spacing (1.5×) if possible. Avoid conveying meaning by color alone (e.g. “green means success”); always use text or symbols in addition to color cues.
  • Write clear, descriptive link and button text. Every link or button in the email should have context. Avoid vague phrases like “Click here” or “Submit”. Instead, use specific text such as “Download your invoice” or “View Order Details” that tells the user where the link goes or what it does. Screen reader users often navigate by jumping from one link to the next, so each link must make sense out of context. As Section508 guidance puts it: “Avoid generic terms and phrases such as ‘Click here.’ Create link text that’s as specific as possible”.
  • Design for keyboard navigation. Some recipients will use the keyboard rather than a mouse. Ensure all interactive elements (links, buttons) are reachable by tabbing. Focus indicators (outline or underline) should be visible so users know which element is active. Most email clients handle basic tabbing by default, but test it. For example, tab through your email using only the keyboard: does the focus move in a logical order (left-to-right, top-to-bottom)? If you’ve added custom CSS, make sure it hasn’t removed the browser’s native focus styles.
  • Be mindful of email client quirks. Not all email clients support every feature of HTML/CSS. For instance, older Outlook for Windows uses the Word rendering engine, which can drop many CSS rules. To handle this, many experts recommend using so-called “ghost tables”: invisible table structures that ensure a consistent layout in Outlook while using normal <div>-based layouts in modern clients. Mailjet advises coding with <div>s and fallback tables so that Outlook users get a reliable structure. Similarly, some semantic HTML5 tags (like <header>, <figure>, <aside>, etc.) or ARIA attributes may not be supported everywhere. As a rule, test your accessible email in major clients (Gmail, Apple Mail, Outlook.com, etc.) and adjust. The goal is to use the best markup you can, while ensuring the email doesn’t break in common inboxes.
  • Test with actual screen readers or checkers. Automated email accessibility checkers can catch obvious issues, but nothing beats a human test. Use tools: for example, Outlook’s built-in Accessibility Checker, the free WAVE extension, or browser devtools. Better yet, try opening your email with a screen reader (NVDA, VoiceOver, Narrator) to hear what a blind user would hear. And double-check contrast with a tool. Apple Mail, Gmail, and Outlook all have fairly good support for alt text and basic markup, so ensure those functions (like alt text reading) actually work.

Side-by-Side Example: Accessible vs. Non-Accessible Email

By now you know the theory. To illustrate, consider the two email designs below. The first email was built entirely as a single image graphic. The second is an improved version. Notice the differences in structure, text, and alt text:

Figure: Non-compliant email example (inaccessible). Here the entire message is a flyer image with no meaningful alt text. A screen reader would only see something like “Flyer image” (or nothing), so all content is lost to visually impaired users. Users cannot select the text, change contrast, or resize it. Essential info (event name, date, call-to-action) is trapped in the image.

Figure: Accessible email example (compliant). This version has the same content but with real text elements and proper image alt text. The headline and details (“Adventure of a Lifetime… Junior Conference 2022”) are coded as text (using <h1>, <p>, etc.), so screen readers can speak them. The header graphic has an alt="The Adventure of a Lifetime with Georgia 4-H – Junior Conference 2022", matching the visible text. The call-to-action (“Register by Aug 1”) and event details are text, not images. This makes the email navigable and understandable by assistive technologies. In short, all information is also present as actual text, so losing the images (e.g. in a blocked-image view) still leaves a coherent message.

These examples highlight key points: Never rely on images to deliver critical text, and always use alt attributes on images. In the accessible version, the screen reader can read all the same details simply by traversing the text and alt tags. In the non-compliant version, none of the important content is accessible.

Compliance Frameworks: WCAG 2.1 and EN 301 549

As mentioned, WCAG 2.1 Level AA is the de facto guide for email accessibility under the EAA. WCAG is the internationally recognized set of guidelines published by the W3C. Although WCAG itself isn’t a law, the EAA makes its key success criteria legally binding in the EU. EN 301 549 is the European standard that supports this: it explicitly “incorporates the WCAG 2.1 AA standard” for digital services. (A new version of EN 301 549 is being prepared for release in 2025 to align fully with the EAA.)

Practically speaking, you should treat an email like a webpage: apply the same WCAG rules. This includes not just what we’ve covered (alt text, headings, contrast), but also other AA criteria like readable language, error identification, etc., wherever relevant. Fortunately, most marketing emails are relatively simple in form. Key things to ensure: headings for navigation (WCAG 2.4.6), descriptive labels for form fields if you have any, and avoiding purely decorative embellishments that aren’t marked as such (WCAG 1.3.1 and 1.1.1).

Finally, note that some countries have their own complementary laws (e.g. Germany’s BITV, France’s RGAA) that align with WCAG. But for cross-border email campaigns in Europe, sticking to EAA/WCAG is the surest path. In summary, if your emails pass WCAG 2.1 AA success criteria, you’ll be well positioned for EAA compliance.

Email Accessibility Checklist (Best Practices)

To help your team remember the essentials, here’s a checklist of best practices for accessible emails under the EAA. Use this when reviewing your email templates or planning new campaigns:

  • Email format: Send HTML emails, not plain-text or RTF. HTML allows semantic markup (headings, lists, etc.).
  • Structure: Use <h1> for the main title/headline, then <h2>, <h3> in logical order. Wrap content in <p> tags, and use <ul>/<li> or <ol> for lists. Avoid using <p> tags just for spacing (use CSS padding/margin instead).
  • Text content: Keep all important info as text, not images. Make sure fonts are at least 14px (12pt) and readable, and choose a simple sans-serif font.
  • Alt text: Every informative image must have a succinct, descriptive alt="...". Decorative images should have alt="" so they are skipped. Do not put meaningful text inside images without also providing it as real text.
  • Contrast: Verify text/background contrast is ≥4.5:1 for normal text (≥3:1 for large/bold text). Use a color-contrast checker tool to confirm. Avoid very light text on light backgrounds or vice versa.
  • Links/buttons: Use descriptive link labels (e.g. “Download Invoice” vs. “Click here”). Every link text should make sense on its own. Similarly, label buttons with their purpose.
  • Keyboard navigation: Ensure tab order is logical. Check that all interactive items (links, buttons, form fields) can be reached with the keyboard and have a visible focus indicator.
  • Tables: If you use tables for layout, add table headers (<th>) and avoid empty cells. (Better yet, use CSS layout for simple structures.) If you present actual data in a table, make sure it has row/column headings.
  • Language: Specify the email’s language with lang="en" (or whatever) on the <html> tag so screen readers pronounce text correctly.
  • Avoid problematic features: Don’t rely on JavaScript or complex ARIA in emails (many clients strip or ignore these). Avoid blinking/scrolling text and other dynamic effects that can cause seizures or readability issues.
  • Test thoroughly: Use accessibility checkers (e.g. WAVE, Axe DevTools) and have someone navigate with a screen reader (VoiceOver on Mac/iOS, NVDA on Windows, etc.). Check your emails in major clients (Gmail, Outlook, Apple Mail) and devices to ensure formatting and alt text survive the rendering.

By systematically applying these guidelines, you’ll cover the main WCAG criteria for emails (structure, text alternatives, contrast, navigation, etc.). Keep this checklist handy for all your email projects.

Call to Action: Taking Steps Now

The EAA’s 2025 deadline is approaching quickly. Don’t wait until it’s an emergency to audit your email templates. Here are immediate action steps:

  1. Audit your current emails. Use an accessibility testing tool or manual review to identify issues in your most critical emails (newsletters, order receipts, password resets).
  2. Fix the high-impact problems first. For example, add alt text to all images and correct any very low-contrast text.
  3. Switch to accessible email templates. Update your email generator or marketing platform with templates that follow best practices (proper tags, CSS, etc.). Many email marketing tools have accessible template libraries or modules you can adopt.
  4. Train your team. Make sure content writers and developers know these rules. Even non-technical team members should avoid pasting images of text or using ambiguous link phrases.
  5. Build ongoing processes. Incorporate email accessibility into your QA/testing checklists. For example, use Outlook’s built-in Accessibility Checker or similar tools before sending major campaigns. Schedule periodic reviews of email content as you would any compliance task.

By preparing now, you turn the EAA from a compliance headache into an opportunity. Accessible emails not only meet EU law but also improve overall user experience and brand reputation. They can increase engagement – after all, if more people can read your message, it’s more effective marketing. Treat this as a worthwhile upgrade rather than a burden.

Call to Action: Audit your email systems today. Use the checklist above to evaluate your top email templates. Plan any necessary redesign or coding work before mid-2025. Remember that email accessibility is part of the broader EU accessibility landscape – so aligning with WCAG 2.1 AA will also serve you under EN 301 549 and other regulations.

In summary, achieving EAA email compliance means building accessible emails Europe across your organization. Follow the guidelines and checklist above to make your marketing and transactional emails inclusive for all users. Taking these steps now will ensure you meet the European Accessibility Act 2025 requirements, avoid fines, and open up your communications to a wider audience.

Sources: Guidelines and data in this post are drawn from EU official releases and recognized accessibility authorities, including industry experts on email compliance. The side-by-side email examples are for illustration of these principles. Use this as a starting point for email accessibility planning under the EAA.