How to Transfer Your Website, Domain, and Email Accounts from GoDaddy, Hostinger, BlueHost, and BigRock to Systron.net

Section 1: Transferring from GoDaddy to Systron.net

Introduction:

Moving your website, domain, and email accounts from GoDaddy to Systron.net involves a few key steps. In this tutorial, we’ll guide you through each stage, complete with screenshots, so you can seamlessly migrate to Systron.net without data loss or downtime.


Step 1: Prepare for the Transfer

  1. Log into your GoDaddy Account
  2. Unlock Your Domain
    • Go to “My Products”“Domains”.
    • Locate the domain you wish to transfer and click “Manage”.
    • Scroll down to find the “Additional Settings” section.
    • Click on “Domain Lock” and toggle it off.
  3. Get the Authorization Code (EPP Code)
    • In the same “Additional Settings” section, click on “Get Authorization Code”.
    • The code will be emailed to your registered email address.
  4. Disable Privacy Protection (if applicable)
    • If you’ve purchased domain privacy protection, go to “Domain Privacy” settings and disable it.

Step 2: Backup Your Website and Email Accounts

  1. Website Backup:
    • Access GoDaddy’s cPanel.
    • Navigate to “Files”“Backup Wizard”.
    • Click “Backup”“Full Backup” and select the directory where your website files are stored.
    • Once the backup is generated, download the .tar.gz file to your local system.
  2. Email Backup:
    • If using GoDaddy’s email service, open your email client (e.g., Outlook).
    • Go to “File”“Open & Export”“Import/Export”.
    • Choose “Export to a file”“Outlook Data File (.pst)” and select the email account.
    • Complete the export and save the .pst file.

Step 3: Update DNS Records for Systron.net

  1. Log into GoDaddy’s DNS Settings:
    • Go to “My Products”“Manage DNS”.
    • Note down your A Records, MX Records, and any Custom CNAME Records.
  2. Modify the DNS Records at Systron.net:
    • After the transfer is complete, go to Systron.net’s DNS Management Panel.
    • Replicate the DNS settings using the details you noted.

Step 4: Transfer the Domain to Systron.net

  1. Initiate the Transfer at Systron.net:
    • Log into your Systron.net Account.
    • Go to “Domain Services”“Transfer Domain”.
    • Enter your domain name and paste the Authorization Code you received from GoDaddy.
    • Follow the on-screen instructions to complete the transfer.
  2. Approve the Transfer:
    • Check your email for a transfer confirmation from GoDaddy.
    • Click the “Approve Transfer” link in the email.

Step 5: Upload Website Data and Restore Emails

  1. Upload Website Files:
    • Use Systron.net’s cPanel File Manager or an FTP client like FileZilla.
    • Navigate to “Public_html” and upload the .tar.gz backup file.
    • Extract the file and ensure all directories are correctly placed.
  2. Restore Email Accounts:
    • Set up email addresses using Systron.net’s Email Management panel.
    • Use Outlook to import the .pst file for each email account.

Step 6: Verify the Migration

  1. Check Website Functionality:
    • Test your website using the new URL at Systron.net.
    • Check for broken links, missing images, and database connectivity.
  2. Test Email Accounts:
    • Send and receive test emails to ensure that they are correctly routed through Systron.net’s mail servers.

Section 2: Transferring from Hostinger to Systron.net

Step 1: Unlock Domain and Get the Authorization Code

  1. Log into Hostinger and navigate to the “Domains” section in the hPanel dashboard.
  2. Click on the specific domain you want to transfer.
  3. Unlock the Domain:
    • Look for the “Domain Lock” option under Domain Settings.
    • Toggle it Off to unlock the domain.
  4. Get the EPP Code (Authorization Code):
    • Scroll to the “Transfer” section and click on “Request EPP Code”.
    • Hostinger will send the EPP Code to your registered email address.

Step 2: Backup Website and Email Accounts

  1. Website Backup:
    • In hPanel, go to “Files”“Backups”.
    • Choose “Generate New Backup”.
    • Once the backup is complete, download the generated .zip file to your local system.
  2. Database Backup (if applicable):
    • Access “phpMyAdmin” from the “Databases” section.
    • Select your website’s database, click on “Export”, and download the .sql file.
  3. Email Backup:
    • If using Hostinger’s email services, open hPanel and go to “Emails”.
    • Click on the specific email account.
    • Use the “Export” feature to save your emails to your local system.

Step 3: Update DNS Records

  1. Log into the hPanel DNS Zone Editor.
  2. Note down your existing A, MX, CNAME, and TXT Records.
  3. After transferring to Systron.net, replicate these records in Systron.net’s DNS Management Panel.

Step 4: Initiate the Domain Transfer to Systron.net

  1. Log into your Systron.net account.
  2. Go to the “Transfer Domain” section and enter your domain name.
  3. Paste the EPP Code received from Hostinger and initiate the transfer.
  4. Check your email for a transfer confirmation link and approve it.

Step 5: Restore Website and Emails at Systron.net

  1. Upload Website Files:
    • Use the File Manager in Systron.net’s cPanel or an FTP client.
    • Navigate to “Public_html” and upload your backup .zip file.
    • Extract and place the files in their respective directories.
  2. Restore Databases:
    • Use phpMyAdmin in Systron.net’s cPanel.
    • Create a new database and import the .sql file.
  3. Restore Emails:
    • Set up the same email addresses in Systron.net.
    • Import your emails using tools like Outlook.

Step 6: Final Verification

  • Test your website and email functionality.

Section 3: Transferring from BlueHost to Systron.net

Step 1: Unlock Domain and Get EPP Code

  1. Log into BlueHost and go to “Domains”.
  2. Click on “Manage” next to the domain you want to transfer.
  3. Unlock the Domain:
    • In the Domain Management section, find the “Registrar Lock” option.
    • Toggle it to Off.
  4. Get the Authorization Code:
    • Scroll down to the “Transfer” section and click on “Get EPP Code”.
    • BlueHost will email the code to your registered email address.

Step 2: Backup Your Website and Email Data

  1. Website Backup:
    • Go to cPanel and click on “Backup”.
    • Select “Generate Full Backup” and download the .tar.gz file.
  2. Database Backup:
    • In cPanel, access “phpMyAdmin”.
    • Select your database, click “Export”, and download the file.
  3. Email Backup:
    • Open Webmail and go to “Export” under Account Settings.
    • Save your email data to a .mbox or .pst file.

Step 3: Modify DNS Records

  1. Go to DNS Zone Editor in BlueHost’s cPanel.
  2. Document all existing DNS records (A, CNAME, MX, and TXT).
  3. Update these records at Systron.net once the domain transfer is complete.

Step 4: Transfer Domain to Systron.net

  1. Log into Systron.net and go to “Transfer Domain”.
  2. Enter your domain and the EPP Code received from BlueHost.
  3. Confirm the transfer request via the approval email sent by BlueHost.

Step 5: Restore Data and Emails at Systron.net

  1. Upload Website Files:
    • Use cPanel File Manager at Systron.net.
    • Upload the .tar.gz backup file and extract it.
  2. Import Database:
    • In phpMyAdmin, create a new database and import the .sql file.
  3. Email Restoration:
    • Set up the same email addresses and import your .mbox or .pst files.

Step 6: Test and Verify

  • Test the website and email functionality.

Section 4: Transferring from BigRock to Systron.net

Step 1: Unlock Domain and Get the Authorization Code

  1. Log into your BigRock account and go to “Domain Management”.
  2. Unlock the Domain:
    • In the “Security” section, turn off “Domain Lock”.
  3. Get the Authorization Code:
    • Click on “Get EPP Code” in the “Transfer” section.
    • The code will be sent to your registered email.

Step 2: Backup Website and Email Accounts

  1. Website Backup:
    • Access BigRock’s cPanel.
    • Navigate to “Files”“Backup Wizard”.
    • Click “Full Backup” and download the generated backup file.
  2. Database Backup:
    • Open phpMyAdmin, select your database, and click “Export”.
  3. Email Backup:
    • Go to Email Accounts in cPanel.
    • Use an email client like Thunderbird to export emails from your BigRock account.

Step 3: Update DNS Records

  1. In BigRock’s DNS Management panel, take note of your DNS settings.
  2. After the transfer is complete, update these records in Systron.net’s DNS panel.

Step 4: Transfer the Domain to Systron.net

  1. Log into Systron.net and navigate to “Domain Transfer”.
  2. Enter your domain name and paste the EPP Code.
  3. Approve the transfer via the link sent by BigRock.

Step 5: Restore Website and Email Data at Systron.net

  1. Upload Website Files:
    • Use the File Manager to upload the backup file and extract it.
  2. Import Databases:
    • Create a new database and import your .sql file using phpMyAdmin.
  3. Email Setup:
    • Set up email addresses and import the backup data.

Step 6: Test the Website and Email Services

  • Visit your site to check for functionality.
  • Send and receive emails to ensure everything is set up correctly.

How to Backup and Restore MySQL Databases Using mysqldump Command

In the world of database management, backups are a cornerstone of data security and disaster recovery. MySQL, a widely used open-source relational database management system, offers powerful tools to create and restore backups efficiently. This comprehensive guide will delve into the mysqldump command, a versatile utility for backing up and restoring MySQL databases. We’ll cover various use cases, from backing up a single table to restoring an entire database.

Backing up your MySQL databases is essential for protecting your data against accidental loss, corruption, or system failures. This guide will walk you through the process of using the mysqldump command to back up and restore your MySQL databases, covering various scenarios such as backing up a single database, multiple databases, and all databases. We’ll also explore how to restore databases and specific tables, and provide tips for beginners and advanced users alike.

Understanding mysqldump

mysqldump is a command-line tool that generates SQL dump files containing the database structure (schema) and data. These dump files can be used to restore the database to its original state or to create a new database with the same structure and data.

Backup a Single Database

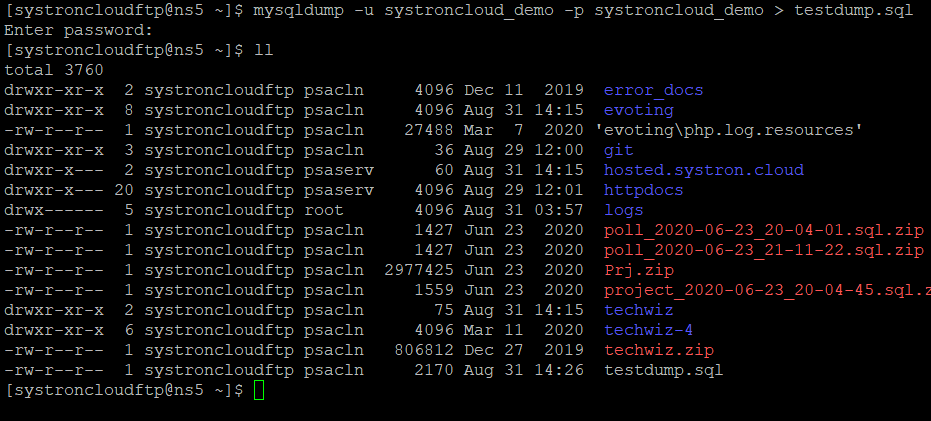
To back up a single MySQL database, use the following command:


mysqldump -u [username] -p [database_name] > [backup_file.sql]

mysqldump single database backup command screenshot

Replace [username] with your MySQL username, [database_name] with the name of the database you want to back up, and [backup_file.sql] with the name of the file to which you want to save the backup.

Backup Multiple Databases

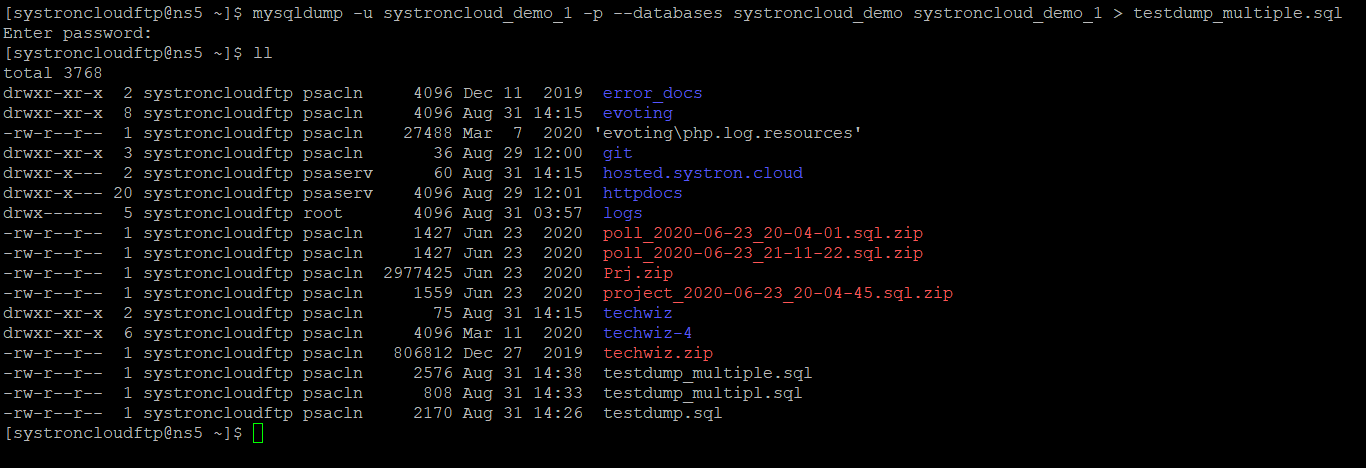
To back up multiple databases, specify them in the mysqldump command as shown below:


mysqldump -u [username] -p --databases [database_name1] [database_name2] > [backup_file.sql]

mysqldump multiple databases backup command screenshot

List the databases you want to back up after the --databases flag, separated by spaces.

Backup All Databases

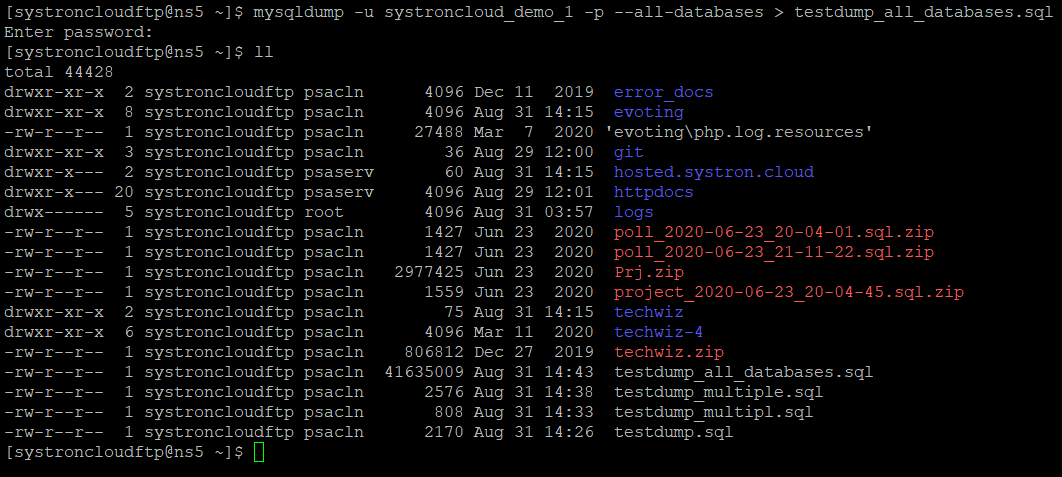
To back up all MySQL databases on your server, use this command:


mysqldump -u [username] -p --all-databases > [backup_file.sql]

mysqldump all databases backup command screenshot

This command backs up every database on the MySQL server to a single SQL file.

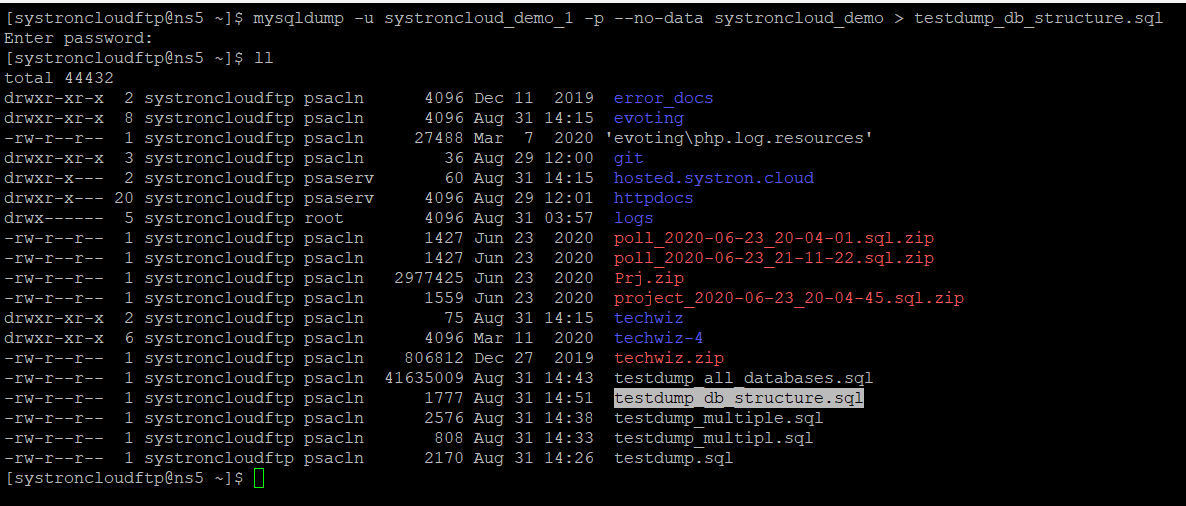
Backup Database Structure Only

To back up just the structure (schema) of a database without the data, use:


mysqldump database structure backup command screenshot

The --no-data flag ensures that only the database structure is backed up, excluding the data.

Backup a Specific Table

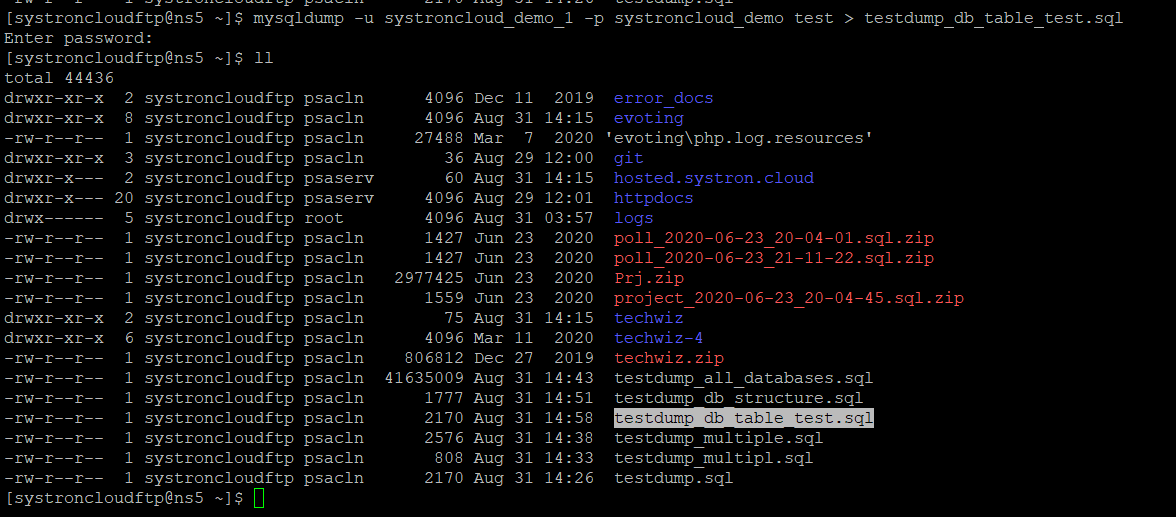
If you need to back up a specific table within a database, use this command:


mysqldump -u [username] -p [database_name] [table_name] > [backup_file.sql]

mysqldump specific table backup command screenshot

Replace [table_name] with the name of the table you wish to back up.

Backup Database Data Only

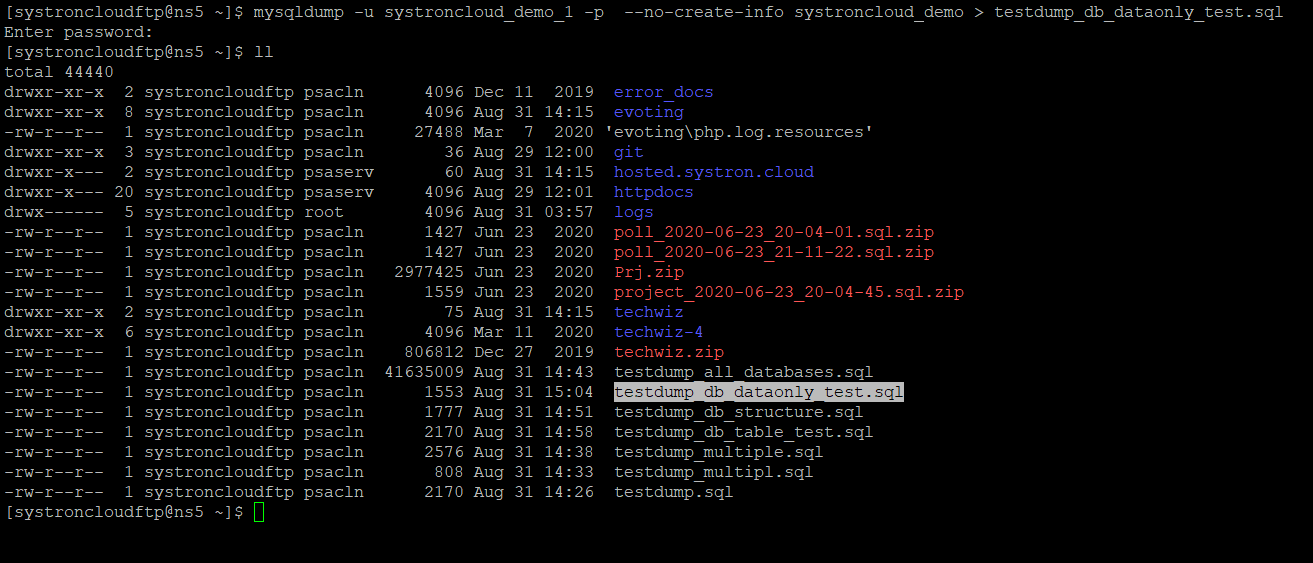
To back up only the data without the structure, run:


mysqldump -u [username] -p --no-create-info [database_name] > [backup_file.sql]

mysqldump database data backup command screenshot
class=”img-responsive”
The --no-create-info flag excludes the table creation statements from the backup.

Restore a MySQL Database

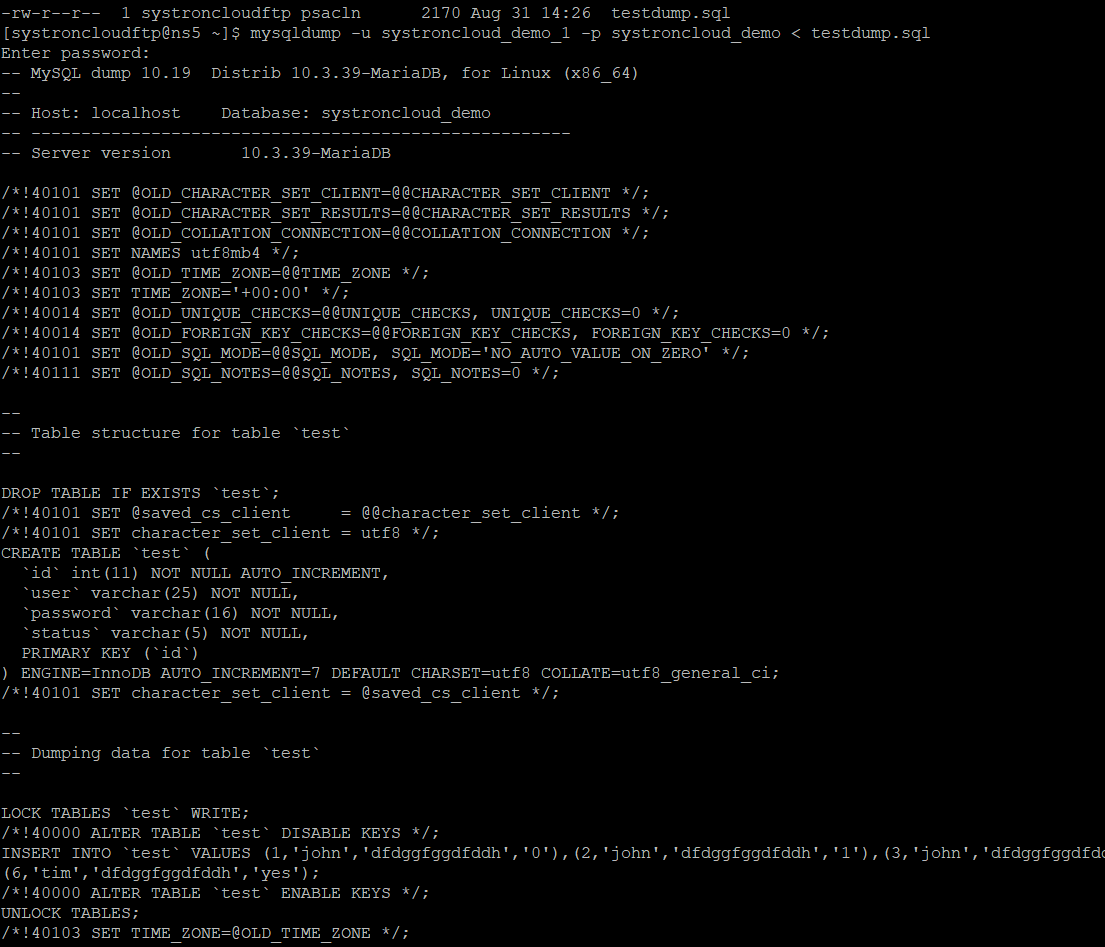
To restore a MySQL database from a backup file, use the following command:


mysql -u [username] -p [database_name] < [backup_file.sql]

mysql database restore command screenshot

Ensure the database exists before restoring it. You can create the database with this command:


mysql -u [username] -p -e "CREATE DATABASE [database_name];"

Restore a Specific Table in the Database

To restore a specific table from a backup file, ensure the backup file contains only the data for that table and use:


mysql -u [username] -p [database_name] < [backup_file.sql]

mysql restore specific table command screenshot

Using phpMyAdmin for Backup and Restore

If you prefer a graphical interface, phpMyAdmin makes it easy to back up and restore MySQL databases:

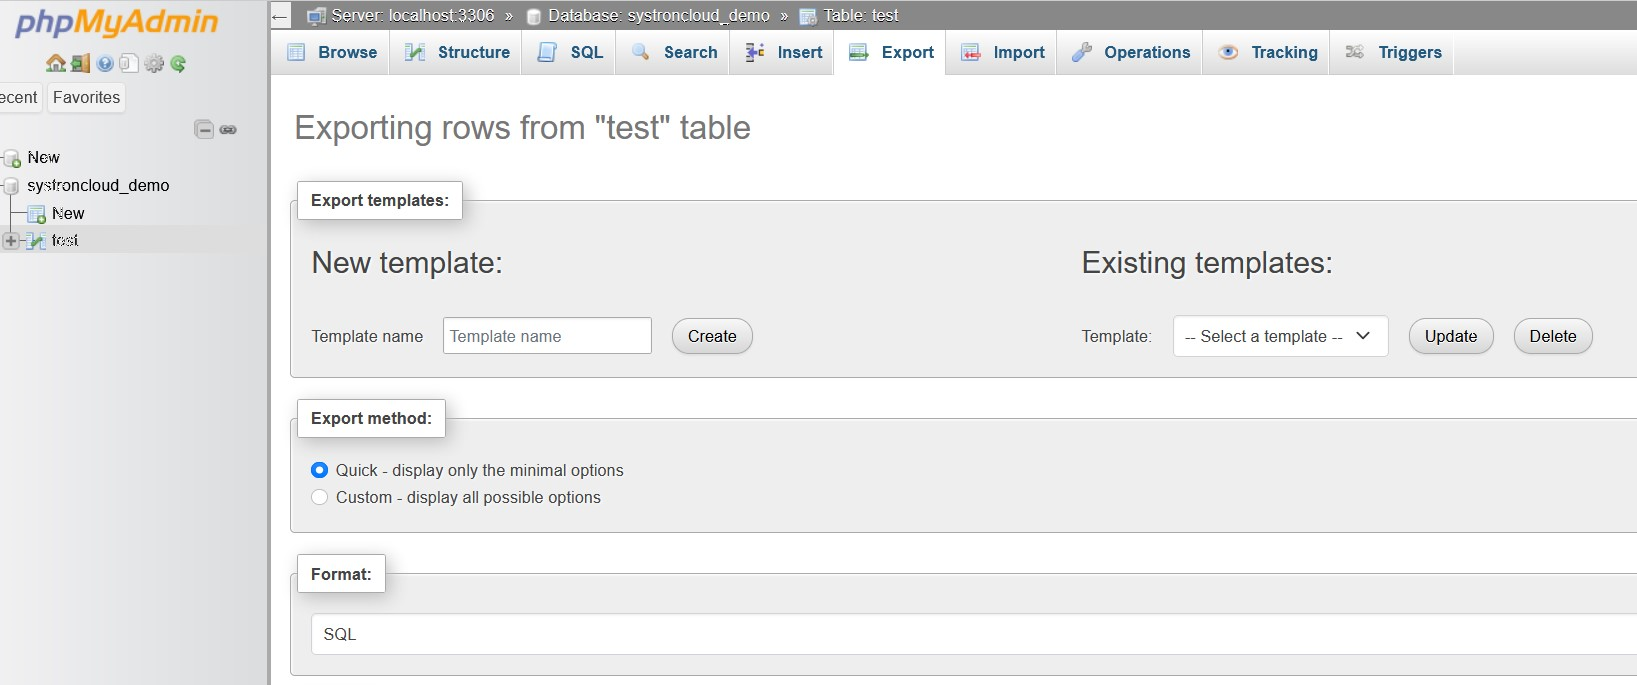
  • Backup: Log in to phpMyAdmin, select the database you want to back up, click the “Export” tab, choose the export method and format, and click “Go” to download the backup file.
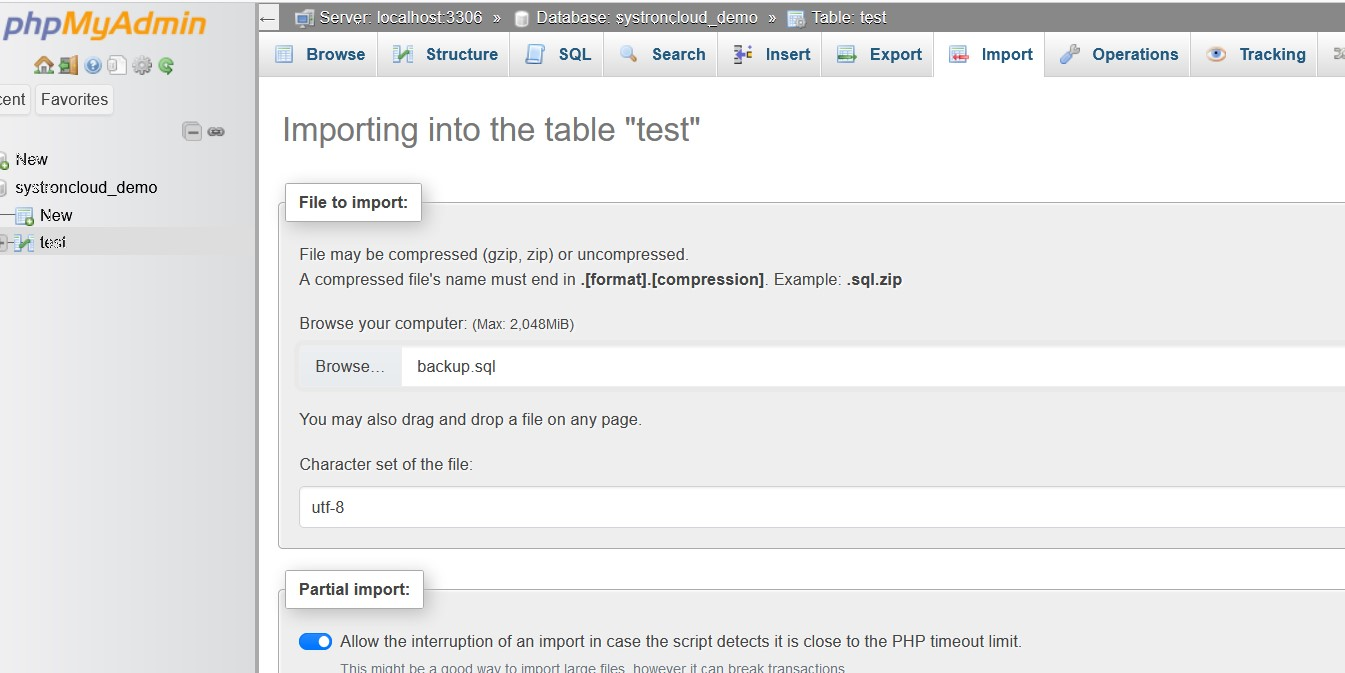
  • Restore: Log in to phpMyAdmin, select the database, click the “Import” tab, choose the backup file to upload, and click “Go” to restore the database.

phpMyAdmin backup screenshot
phpMyAdmin restore screenshot

Additional Tips and Tools

  • Compression: Compress the dump files using tools like gzip or bzip2 to save storage space and improve backup performance.
  • Scheduling: Automate backups using tools like cron on Linux or Task Scheduler on Windows.
  • Backup Rotation: Implement a backup rotation strategy to retain multiple versions of your database.
  • Cloud Storage: Consider storing backups in cloud storage services like Amazon S3 or Google Cloud Storage for off-site redundancy.

Free and Open Source Tools to Manage MySQL Databases

Here are some popular free and open-source tools to help you manage MySQL databases:

  • phpMyAdmin: A widely-used web-based interface for managing MySQL databases.
  • Adminer: A lightweight alternative to phpMyAdmin with a simple and intuitive interface.
  • MySQL Workbench: A powerful desktop application for database design, administration, and development.
  • DBeaver: An open-source database tool that supports multiple database types, including MySQL.
  • Percona XtraBackup: A high-performance, online backup solution for MySQL.
  • Xtrabackup-ZFS: Integrates Xtrabackup with ZFS for efficient storage and snapshotting.

Advanced Features for Seasoned Developers

For experienced developers, MySQL offers advanced features such as:

  • Replication: Set up master-slave replication for real-time backups and failover. Use MySQL replication to create a secondary server and take backups from it, minimizing downtime.
  • Triggers: Automate actions in your database with triggers that execute in response to specific events.
  • Stored Procedures: Create reusable SQL code blocks with stored procedures for more efficient database management.
  • Partitioning: Improve performance by partitioning large tables into smaller, more manageable pieces.
  • Event-Based Backups: Trigger backups based on specific events, such as database changes or scheduled intervals.
  • Incremental Backups: Back up only the changes since the last full backup to reduce backup time and storage requirements.

MySQL vs. PostgreSQL: A Comprehensive Comparison for Full Applications

Choosing the right database management system (DBMS) is crucial for the success of any application. MySQL and PostgreSQL are two of the most popular open-source relational databases, each with its own strengths and weaknesses. This article will delve into their key features, advantages, disadvantages, and use cases to help you make an informed decision.

Understanding MySQL and PostgreSQL

MySQL is a widely used, high-performance relational database management system known for its speed and simplicity. It’s often the default choice for web applications due to its ease of use and scalability.

PostgreSQL, on the other hand, is a powerful, object-relational database system that emphasizes data integrity, reliability, and advanced features. It’s suitable for complex applications requiring robust data handling and analysis.

Key Features Comparison

Feature MySQL PostgreSQL
ACID Compliance Yes Yes
Data Types Basic Richer, including arrays, JSON, and more
Indexing Supports various indexing types Supports advanced indexing, including GIN and BRIN
Transactions Supports transactions Strong support for transactions and isolation levels
Foreign Key Constraints Supports Supports
Triggers Supports Supports
Stored Procedures Supports Supports
Full Text Search Basic Advanced, with support for ranking and relevancy
Replication Supports Supports, with advanced features like streaming replication
High Availability Supports clustering Supports clustering and advanced replication features

Advantages and Disadvantages

MySQL

Advantages:

  • High performance for read-heavy workloads
  • Easy to use and administer
  • Large community and extensive support
  • Widely adopted in the industry
  • Cost-effective

Disadvantages:

  • Limited data types and features compared to PostgreSQL
  • Potentially weaker data integrity for complex applications
  • Scalability challenges for extremely large datasets

PostgreSQL

Advantages:

  • Advanced features like JSON, arrays, and full-text search
  • Strong data integrity and consistency
  • Scalability and performance improvements in recent versions
  • Active community and growing ecosystem
  • Suitable for complex applications

Disadvantages:

  • Can be more complex to set up and administer
  • Performance might be slightly lower for simple workloads compared to MySQL
  • Smaller market share than MySQL

Use Cases

MySQL is ideal for:

  • Web applications with high read traffic
  • Content management systems (CMS)
  • Online stores
  • Applications with simple data structures

PostgreSQL is well-suited for:

  • Complex web applications with heavy write loads
  • Geospatial applications
  • Data warehousing and analytics
  • Enterprise applications requiring advanced features
  • Applications with high data integrity requirements

When to Choose Which Database

Ultimately, the best database for your application depends on specific requirements:

  • Prioritize performance and simplicity: MySQL is a good choice.
  • Need advanced features, data integrity, and scalability: PostgreSQL is a strong contender.
  • Balancing performance and features: Consider both options and benchmark them with your specific workload.

It’s essential to evaluate your application’s needs carefully and consider factors such as data volume, complexity, scalability, and performance expectations. In some cases, using both databases in a hybrid architecture might be beneficial.

By understanding the strengths and weaknesses of MySQL and PostgreSQL, you can make an informed decision that will positively impact your application’s performance and reliability.