Supercharging Your PHP & WordPress Analytics: How to Replace MySQL with DuckDB


A step-by-step guide to migrating analytical workloads to an in-process, columnar powerhouse.

For decades, the LAMP stack (Linux, Apache, MySQL, PHP) has been the bedrock of web development. MySQL excels at handling transactions, creating users, and saving blog posts. However, when your PHP application or WordPress site needs to generate heavy reporting dashboards, aggregate millions of rows, or run complex business intelligence (BI) queries, MySQL can choke.

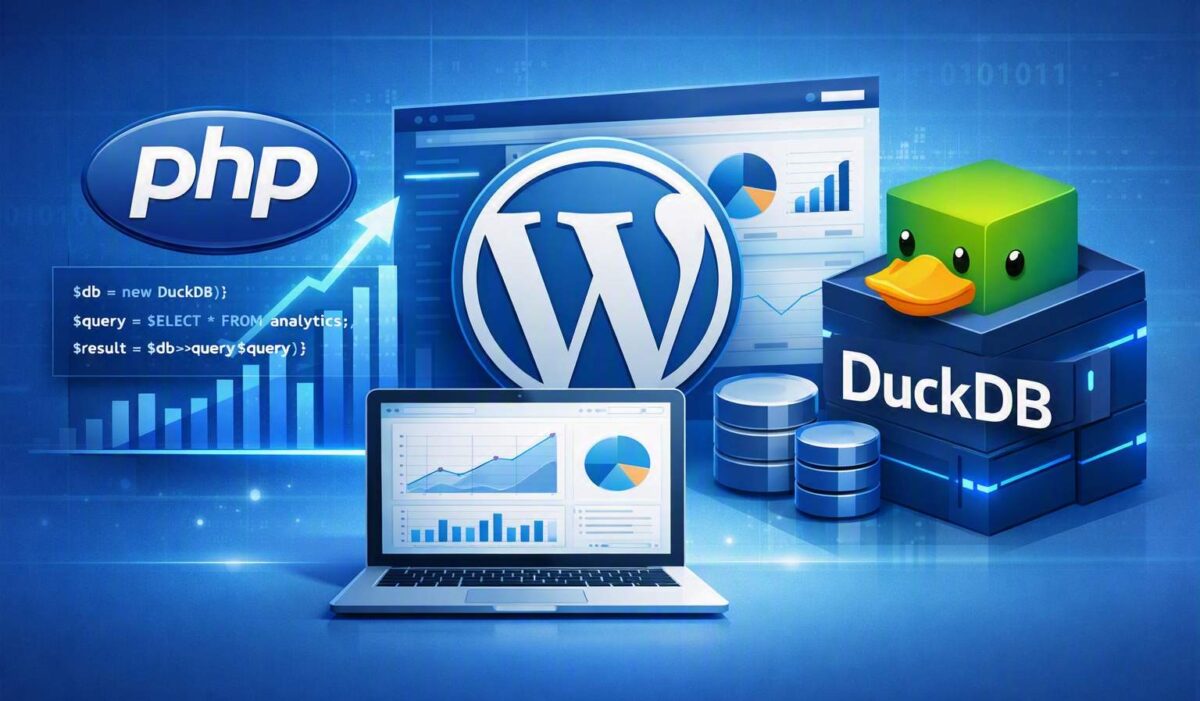
Enter DuckDB: an embedded, columnar database engine designed specifically for fast analytical query execution. Think of it as the SQLite for analytics. Let’s explore why you should pair or replace your analytical MySQL pipelines with DuckDB, along with practical implementation steps for PHP, MySQL, and WordPress environments.

Why Move Analytical Workloads to DuckDB?

    • Blazing Fast Analytics: DuckDB uses vectorized query execution and columnar storage. Instead of reading row-by-row like MySQL’s InnoDB engine, it processes blocks of similar data simultaneously, transforming queries that take minutes in MySQL into fractions of a second.
    • In-Process Simplicity: No database server daemon to manage, update, or open network ports for. It runs directly inside your runtime or via lightweight CLI/extensions.
    • Drastic Storage Compression: Its columnar structure means identical data types live next to each other, allowing DuckDB to heavily compress analytical tables to a fraction of MySQL’s disk footprint.
    • File-System Interoperability: It can query raw CSV, JSON, and Parquet files directly using standard SQL without needing to import them first.
Important Mindset Shift: DuckDB is an OLAP (Online Analytical Processing) tool. Do not completely strip MySQL away if your web app needs high-frequency concurrent writes (like hundreds of users logging in at once). Instead, look at DuckDB to replace the reporting/analytical backend or handle heavy background data processing.

Step-by-Step Guide: Connecting DuckDB to Your MySQL Database

DuckDB makes it incredibly easy to bridge data over using its official MySQL extension. You don’t even need complex ETL tools; DuckDB can connect directly to your database server and pull tables into memory or a local file.

Step 1: Install and Launch DuckDB

Download the DuckDB CLI for your operating system or use a package manager. Once opened, you can run the following SQL commands to link MySQL:

-- Install and load the official MySQL extension
INSTALL mysql;
LOAD mysql;

-- Connect directly to your existing MySQL database
ATTACH 'host=127.0.0.1 user=root password=secret dbname=my_web_app' AS mysql_db (TYPE MYSQL);

Step 2: Copy and Convert Tables into Columnar Format

Once attached, moving your transactional tables into DuckDB’s highly-optimized file structure takes a single standard SQL command:

-- Create a native, compressed DuckDB table directly from MySQL data
CREATE TABLE analytical_orders AS SELECT * FROM mysql_db.orders;

Implementing DuckDB in PHP Development

Since DuckDB does not run as a standalone server, PHP applications interact with it via the official DuckDB PHP Extension or by using the CLI wrapper in background Cron jobs.

Example: Querying DuckDB inside a PHP Script

First, make sure the DuckDB extension is installed on your PHP environment. Here is how you initialize a local analytics database and process metrics instead of relying on MySQL:

<?php
// 1. Initialize or open an embedded DuckDB file database
$db = new DuckDB\Database('analytics_warehouse.db');
$connection = $db->connect();

// 2. Querying data using standard SQL syntax
$result = $connection->query("
    SELECT 
        EXTRACT(YEAR FROM order_date) as order_year,
        COUNT(order_id) as total_sales,
        SUM(grand_total) as gross_revenue
    FROM analytical_orders
    GROUP BY 1
    ORDER BY 3 DESC
");

// 3. Fetch and display data inside your application dashboard
while ($row = $result->fetchArr()) {
    echo "Year: " . $row['order_year'] . " | Revenue: $" . number_limit($row['gross_revenue'], 2) . "<br>";
}
?>

Transforming WordPress Analytics with DuckDB

WordPress stores everything inside a highly flexible EAV (Entity-Attribute-Value) schema inside MySQL (specifically the wp_postmeta table). If you have a WooCommerce store with hundreds of thousands of orders, running complex analytical joins across wp_postmeta can freeze your web server.

The Architecture: A Hybrid Approach

Keep WordPress running perfectly on MySQL for day-to-day user operations, but offload the WooCommerce or traffic analytics engine to DuckDB. You can set up a background cron job that exports new data weekly or daily into a localized DuckDB file for instantaneous report generation.

Step-by-Step Dashboard Setup for WordPress

    1. Offload Meta Tables: Write a plugin hook or standalone script that flattens complex meta tables into a clean, flat schema.
    2. Export to Parquet/DuckDB: Use the DuckDB extension to query MySQL and dump results directly into a fast file format like Parquet:
      COPY (SELECT * FROM mysql_db.wp_posts WHERE post_type = 'shop_order') TO 'wp_orders.parquet' (FORMAT PARQUET);
    3. Power the Admin Dashboard: Let your WordPress admin dashboard panel read directly from the generated .db or .parquet files via a localized background execution step, freeing your primary MySQL instance to handle customer checkouts cleanly.
Result: Your WordPress page speed remains ultra-fast during checkout, and admin dashboard reports load in milliseconds rather than causing database timeout errors!

Boosting WordPress Performance: Why Your 1 GB+ MySQL Database Demands an NVMe VPS

When you launch a standard WordPress site, a basic hosting environment usually suffices. However, as your portal scales, a hidden performance bottleneck begins to form beneath the surface: your database.

If your WordPress portal is currently driving a 1 GB or larger MySQL database, standard web hosting will no longer cut it. At this scale, every page load triggers complex database queries that can choke traditional server hardware, leading to sluggish load times, high Time-to-First-Byte (TTFB), and frequent timeout errors.

To keep a data-heavy WordPress portal lightning-fast, you need isolated server resources and high-performance storage infrastructure. Let’s dive into why a Systron NVMe VPS is the definitive architectural solution for large WordPress databases, backed by real-world optimization examples and technical performance metrics.

The Root Problem: Why Large WordPress Databases Slow Down

WordPress is inherently dynamic. Unlike static HTML sites, every visit to a WordPress page forces PHP to run multiple requests to your MySQL database to retrieve post content, user data, plugin configurations, and taxonomy relationships.

[User Visit] ➔ [WordPress PHP Engine] ➔ [Multiple MySQL Queries] ➔ [Disk Read/Write]

(This is where standard SATA SSDs bottleneck) ◄┘

When your database crosses the 1 GB threshold, several critical resource challenges arise:

    • The I/O Bottleneck: A 1 GB database contains millions of rows of data. Traditional SATA SSDs top out at transfer speeds of around 550 MB/s. When multiple users hit your site simultaneously, the storage disk struggles to process the massive queue of read/write operations (Input/Output Operations Per Second, or IOPS).
    • Memory Exhaustion: If your server does not have enough Random Access Memory (RAM) to cache the frequently accessed parts of your database, MySQL is forced to continuously query the physical storage disk. Disk reading is significantly slower than RAM reading.
    • Unoptimized Queries: Plugins like WooCommerce, advanced form builders, or community forums heavily bloat the wp_options and wp_postmeta tables. Searching through a 1 GB unindexed or bloated database on weak hardware results in severe lag.

Enter Systron NVMe Infrastructure: Shattering the SATA Bottleneck

To resolve these resource bottlenecks, Systron.net utilizes advanced Non-Volatile Memory Express (NVMe) architectures across its premium Virtual Private Server (VPS) lineup.

Unlike standard solid-state drives that connect via restrictive, legacy SATA cables, NVMe drives interface directly with the motherboard via high-speed PCIe lanes.

Raw Performance Comparison

Performance Metric Traditional SATA SSD (Budget VPS) Systron NVMe SSD Infrastructure
Read/Write Speeds ~500 to 550 MB/s Up to 3,500 – 7,000 MB/s
IOPS Capabilities ~50,000 to 90,000 IOPS Up to 500,000+ IOPS
Data Pathway Legacy SATA Interface Direct PCIe Lane Connection
Database Execution Queue-bound, causing latency Parallel execution, near-zero lag
By deploying your portal on a Systron NVMe node, your MySQL database can search, index, and retrieve data up to 7 to 20 times faster than on a standard SSD VPS. This drastically reduces your server’s backend processing time, resulting in instantaneous page loads for your visitors.

Concrete Example: Real-World Database Scenarios

To put a 1 GB database into perspective, let’s examine two common WordPress installations and how they behave under different server environments.

Scenario A: The High-Traffic Membership Portal

    • The Setup: A WordPress site with 50,000 registered users, running BuddyBoss and an active community forum. The MySQL database size is exactly 1.2 GB, primarily filled with user metadata, activity logs, and private messages.
    • On a Standard SATA VPS: When 50 users attempt to log in or post updates at the same time, the server hits its IOPS ceiling. The disk cannot keep up with concurrent database writes. Users experience 5-second page delays, and the server intermittently drops connections with 502 Bad Gateway or Error Establishing a Database Connection messages.
    • On a Systron NVMe VPS: Because Systron’s hardware handles hundreds of thousands of concurrent IOPS, the parallel data channels process login verifications and forum writes instantaneously. The database queries execute in milliseconds, keeping resource utilization low even during peak traffic hours.

Scenario B: The WooCommerce Enterprise Store

    • The Setup: An e-commerce store with 10,000 products, complex variable attributes, and a massive wp_postmeta table totaling 1.5 GB.
    • The Problem: Shoppers using the filtered search bar to look for products trigger massive, resource-heavy SQL query strings (SELECT * FROM wp_posts WHERE…).
    • The Systron Advantage: Utilizing Systron’s U.2 NVMe storage blocks combined with isolated CPU cores, product filtering and checkout operations happen seamlessly. Database reads do not back up, eliminating shopping cart abandonment caused by slow checkout pages.

Choosing the Right Systron VPS Architecture for Your Portal

Systron offers two distinct pathways depending on your internal technical expertise and administrative preferences. Both options leverage top-tier storage components but differ in management style.

Option 1: The Hands-Off Approach – Systron Managed NVMe SSD VPS

If you prefer to focus entirely on your content, marketing, and business operations without worrying about server configurations, security patches, or command-line updates, the Systron Managed NVMe SSD VPS tier is highly recommended.

    • Recommended Blueprint: A plan configured with at least 2 to 4 vCPUs and 4 GB of RAM.
    • Why it fits a 1 GB Database: Managed plans are completely optimized right out of the box for database-heavy environments like WordPress, WooCommerce, and Magento.
    • Included Extras: Systron handles the underlying operating system management, implements strict firewall rules, performs automatic daily backups of your critical 1 GB database, and provides standard hosting control panels like cPanel or Plesk. This grants you effortless, graphical access to phpMyAdmin for easy database repairs, table optimizations, and manual .sql backups.

Option 2: The Developer’s Approach – Systron Unmanaged Cloud SSD VPS

If you are a systems administrator or developer comfortable handling server configuration manually via an SSH terminal, the Systron Cloud SSD VPS deployment pipeline offers pure raw power at an unmanaged price tier.

    • Recommended Blueprint: Select a tier offering 2 to 4 Cores, 4 GB RAM, utilizing their enterprise-grade U.2 NVMe storage arrays.
    • Why it fits a 1 GB Database: You get unhindered root access to fine-tune the OS exactly to your database profile. You can deploy a high-performance LEMP Stack (Linux, Nginx, MySQL/MariaDB, PHP-FPM) manually.
    • Performance Tuning Freedom: An unmanaged environment gives you full authority to configure server-side caching pools such as Redis Object Caching or Memcached, reserving large portions of your isolated RAM to store database indexes for zero-disk-read operation speeds.

Actionable Steps: Maximizing Your 1 GB Database on Systron Hardware

Once your portal is live on a Systron VPS, execute these structural optimizations to achieve maximum performance efficiency:

    1. Implement Redis Object Caching: Install Redis on your Systron server and connect it to WordPress via a persistent object caching plugin. This caches your MySQL query results directly into the server’s high-speed RAM, ensuring repetitive queries don’t need to touch the NVMe storage layer at all.
    2. Optimize the wp_options Table: A large database often suffers from thousands of rows of “autoloaded” data in the options table. Regularly audit this table and clean out old transient records left behind by uninstalled plugins.
    3. Configure InnoDB Buffer Pool Size: If you are running an unmanaged server, adjust your my.cnf configuration file. Ensure your innodb_buffer_pool_size is set to roughly 50% to 60% of your total available server RAM. For a 4 GB RAM Systron VPS, allocating 2 GB to the InnoDB buffer pool allows your entire 1 GB database to live comfortably inside the server memory.
    4. Offload Large Media Assets: Keep your database lean by ensuring image, video, and heavy PDF downloads are served via an external Content Delivery Network (CDN) or object storage, keeping your local NVMe storage purely dedicated to rapid PHP execution and MySQL queries.

Conclusion: Don’t Compromise Your User Experience

A 1 GB MySQL database is a major milestone for any WordPress portal—it means your site is rich with data, users, and content. However, running an asset of this scale on slow, outdated server infrastructure will drive away visitors and drag down your search engine rankings due to poor core web vitals.

By migrating your platform to a specialized high‑performance environment like Systron’s NVMe VPS Hosting, you give your MySQL database the IOPS, processing power, and throughput it needs to thrive. Experience faster queries, smoother page loads, and enterprise‑grade reliability — all optimized for WordPress scalability.

Explore Systron NVMe VPS Hosting and unlock next‑level speed for your growing database today.

The Ultimate Guide to E-commerce Success: Unpacking the Pillars of High-Growth Shopify Architecture

Navigating the Shopify Ecosystem: A Beginner’s Map

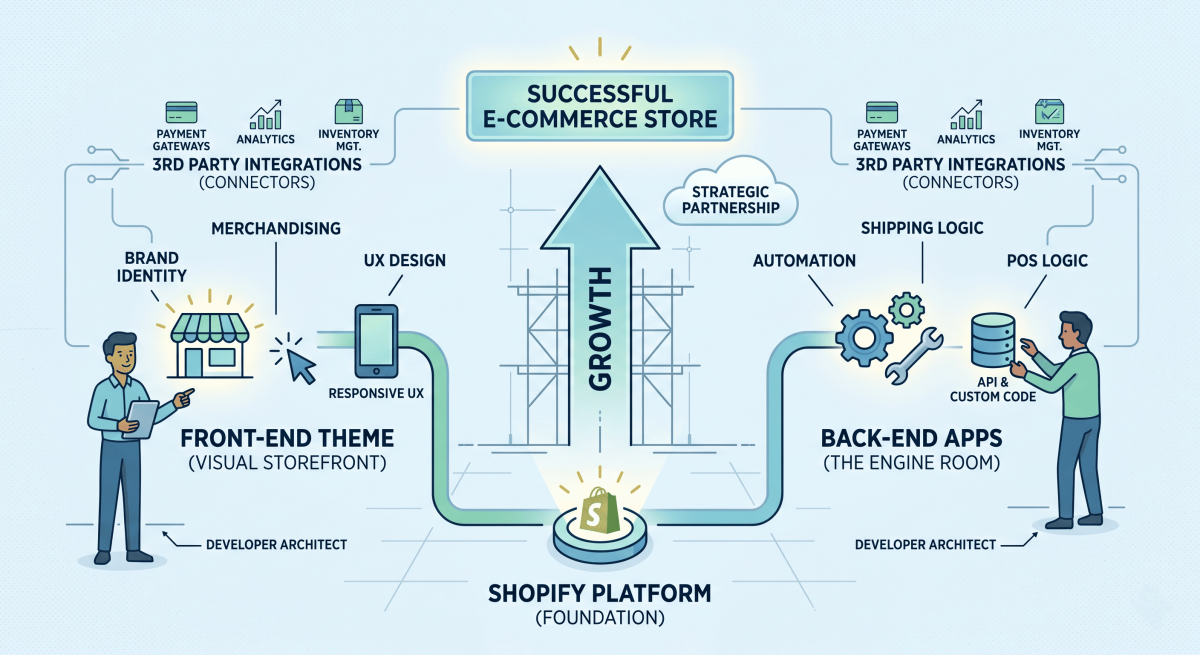
To understand Shopify is to understand the architecture of modern retail. In the e-commerce realm, Shopify stands as the premier software environment for hundreds of thousands of brands globally. As an educator, I view the platform as the “foundation,” but the developer acts as the “architect.”

Shopify is a “robust, scalable, and sophisticated” software platform designed to allow businesses to run modern e-commerce operations with ease and efficiency.

The “So What?” for Business Owners: While Shopify is highly accessible, there is a significant structural gap between a store that uses a “basic template” and one that commands a “competitive edge.” Professional expertise is the bridge across this gap. A developer doesn’t simply “launch” a site; they create a high-performing digital environment where technical scaffolding supports business growth.

To build a successful store, we must first look at the “skin” of the website: the Front-End Theme.

Front-End Theme Design: The Digital Storefront

The Mental Model: Think of the Front-End Theme as the merchandising and lighting in a physical retail store. It is the visual and interactive layer that dictates how customers perceive your brand the moment they walk through the door.

Theme design and development are responsible for everything the customer sees, clicks, and experiences. Professional architects create entirely new themes from scratch or customize existing ones to ensure they are not just “aesthetic,” but highly functional.

  • Brand Identity: Developers create themes that align perfectly with a business’s specific goals. This ensures your digital storefront reflects the unique heart of your brand rather than looking like a generic carbon copy of your competitors.
  • User Experience (UX): A tailored theme meets specific user needs, creating a “frictionless” path to purchase. Excellent UX design removes the “clutter” that often leads to high bounce rates and abandoned carts.
  • Responsiveness: In a mobile-first world, your store must be “fluid.” Custom theme development ensures that the design is responsive, meaning it adapts perfectly to phones, tablets, and desktops to provide a high-quality experience on any device.

While the theme handles how the store looks, we need a different kind of expertise to handle how the store thinks.

Back-End App Development: The Engine Room

The Mental Model: If the theme is the showroom, the Back-End is the stockroom automation and POS logic. This is where the heavy lifting happens—calculating complex shipping rates, managing loyalty logic, or syncing data across systems.

Shopify App Development involves creating tailored functions that are not available “out-of-the-box.” This involves the use of custom code and API integrations to solve specific business problems that standard themes cannot handle.

Feature Category The Breakdown
Architectural Purpose Themes focus on the visual layer and UX; Apps focus on unique business logic and tailored functions.
Primary Technical Focus Themes focus on Brand Identity and Responsiveness; Apps focus on solving “Engine Room” requirements and custom code.
Result for the Customer A beautiful, engaging site (Theme) supported by smooth automation and specialized features (Apps).

A powerful engine is great, but it needs to talk to the rest of the world through third-party integrations.

The Art of Integration: Connecting External Tools

A Shopify developer acts as a technical “connector.” They link your store to the massive external ecosystem required for global trade. To ensure this communication is high-performance, expert providers utilize professional infrastructure, such as private networking for clustered servers and high-capacity connections featuring up to 550 GB/s of internet bandwidth.

The Integration Lifecycle follows this sequence:

  1. Identifying the Tool: Determining which third-party solution (e.g., Bitcoin payment gateways, Google Analytics, or advanced Inventory Management) solves the business need.
  2. Technical Setup: Performing the “behind-the-scenes” configuration to ensure the software and Shopify can communicate via secure APIs.
  3. Data Flow and Automation: Establishing a seamless flow of information so that when an order is placed, inventory is updated and shipments are confirmed automatically without manual entry.

Beyond building the site, there are foundational and high-growth services that keep a business moving forward.

Specialized Tiers: Store Setup and Shopify Plus

Services are often scaffolded based on where a business is in its lifecycle.

Store Setup and Configuration This is the foundational work. It includes setting up the Shopify account, selecting the right plan, arranging payment gateways, and securing a specialized domain to establish a secure online identity.

——————————————————————————–

Shopify Plus is an enterprise-grade solution designed for “fast-growing businesses.” It represents a massive jump in scale, offering:

  • Advanced Customization: Greater control over the checkout experience and specialized scripts.
  • Expansive API Integration: Connecting your store to massive corporate databases or legacy ERP systems.
  • Seamless Migration: Guaranteed data transfer for businesses moving from standard plans or external platforms to the Plus tier.

Even the best-built stores require a safety net of security and ongoing care.

The Safety Net: QA, Security, and Maintenance

Launching a store is just the beginning. To keep a digital business healthy, developers provide a “Safety Net” of technical support and rigorous protection.

The 3 Pillars of Store Health:

  • Proactive Quality Assurance (QA): This involves testing across the entire website lifecycle. Architects look at code quality and website performance to identify bugs before a customer ever encounters them.
  • Regular Updates and Maintenance: Technical teams keep a close eye on site performance, resolving bugs and issues quickly to ensure the store runs smoothly 24/7.
  • Compliance and Security: Security is non-negotiable. Developers implement SSL Certificates to secure online identity and ensure legal compliance. Based on your needs, these range from:
    • Domain Validated (DV): Standard protection.
    • Organization Validation (OV): Higher trust for businesses.
    • Extended Validation (EV): The gold standard for enterprise security.

With the technical facets clear, the final step is understanding the value of a long-term partnership.

Summary: Evaluating Expertise and Value

Hiring a developer is a strategic decision that impacts your bottom line. According to industry data, customized Shopify stores eliminate the need for intermediary stores, which directly boosts profit margins.

While a customized project often requires an investment below 10,000** (with hourly rates averaging **25–$49), the Return on Investment (ROI) is found in higher conversion rates and sales volume. When choosing a partner, prioritize those with an industry track record and a clear approach to e-commerce strategy.

Learner’s Checklist

Use this checklist to evaluate potential Shopify service providers:

  • [ ] Technical Track Record: Do they have a portfolio of past projects similar in scale to your industry?
  • [ ] Full-Service Capability: Can they handle both the “Skin” (Themes) and the “Engine” (Apps/APIs) to avoid team fragmentation?
  • [ ] Project Management Maturity: Do they use professional collaboration tools like Jira or Asana to track milestones?
  • [ ] Pricing Transparency: Do they provide a clear price breakdown aligned with the 25–49/hr or $10k project baseline?
  • [ ] Training and Documentation: Will they teach your internal team how to manage the store modules independently after launch?
  • [ ] Security Expertise: Do they understand the requirements for SSL (DV, OV, or EV) and regional privacy regulations?
  • [ ] Cultural and Growth Alignment: Are they capable of supporting your business as you scale toward tiers like Shopify Plus?